Phew...third post today! Well, I had to catch up on all those posts I meant to create weeks ago.
This post is *drum roll please* my first tutorial.
The Finished Product:
The Instructions:
 |
| First, choose your yarn. This is the yarn that I used. It is pretty chunky and very soft (the soft part is a must considering it goes around you neck) |
|
 |
| After choosing your yarn, start snipping. I cut strands so that, when hanging around my neck, the ends of the strands touch a few inches below my hips. They turned out to be around 4.5'. Note: To add more visual interest, vary the lengths of the yarn. | |
|
 |
| Keep snipping until you have about 40 strands (Don't worry about counting, just estimate or judge by the picture). |
|
 |
| After you have cut all of your strands of yarn, fold each one individually in half (you can do this as you go along if you prefer, i.e cut, fold, cut, fold...). The reason for this is to make sure you don't have a strands of yarn that go down to your thighs on one side and barely make it around you neck on the other. |
 |
| I found it handy to, after folding the strand in half, slip it onto a headband to make sure it stays folded nicely. |
|
|
 |
| You should now have something that looks like this. |
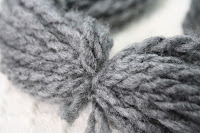 |
| Next, cut a piece of yarn and tie it at the center of the yarn strands (the place where they fold over the headband) and snip the ends. |
 |
I then hot glued a elastic hair band to the rosettes by placing it on the back and then gluing a piece of fabric on top. To put the rosettes on the scarf, put the scarf around your neck and bring both sides together. Twist the hair band around the yarn just like you twist a hairband in your hair.
|
|
 |
| Viola! There you have it! |
Inspiration from this project came from Green Craft Magazine


